Your Guide for Upgrading MacBook Hardware
What if there was a way to improve your MacBook’s hardware without needing to spend money on a new computer? Sounds like a good option, particularly for those who are unhappy with their current Mac’s performance.
An outdated model does not necessarily mean the need to look elsewhere and get rid of the computer you have used for a while. No, a hardware upgrade can make a significant difference.
Some of the hardware upgrade benefits include the MacBook not taking as long to load or remove apps (you can check this post on more about uninstalling Mac apps), there will be fewer instances of video games crashing or dropping frames, the battery will last longer.
And when it comes to MacBooks, you have three clear upgrade options – drive, RAM, and GPU.
You could hire someone to do the work for you or take the task upon yourself. Regardless of your choice, the guidelines below should come in handy.
Upgrading Drive
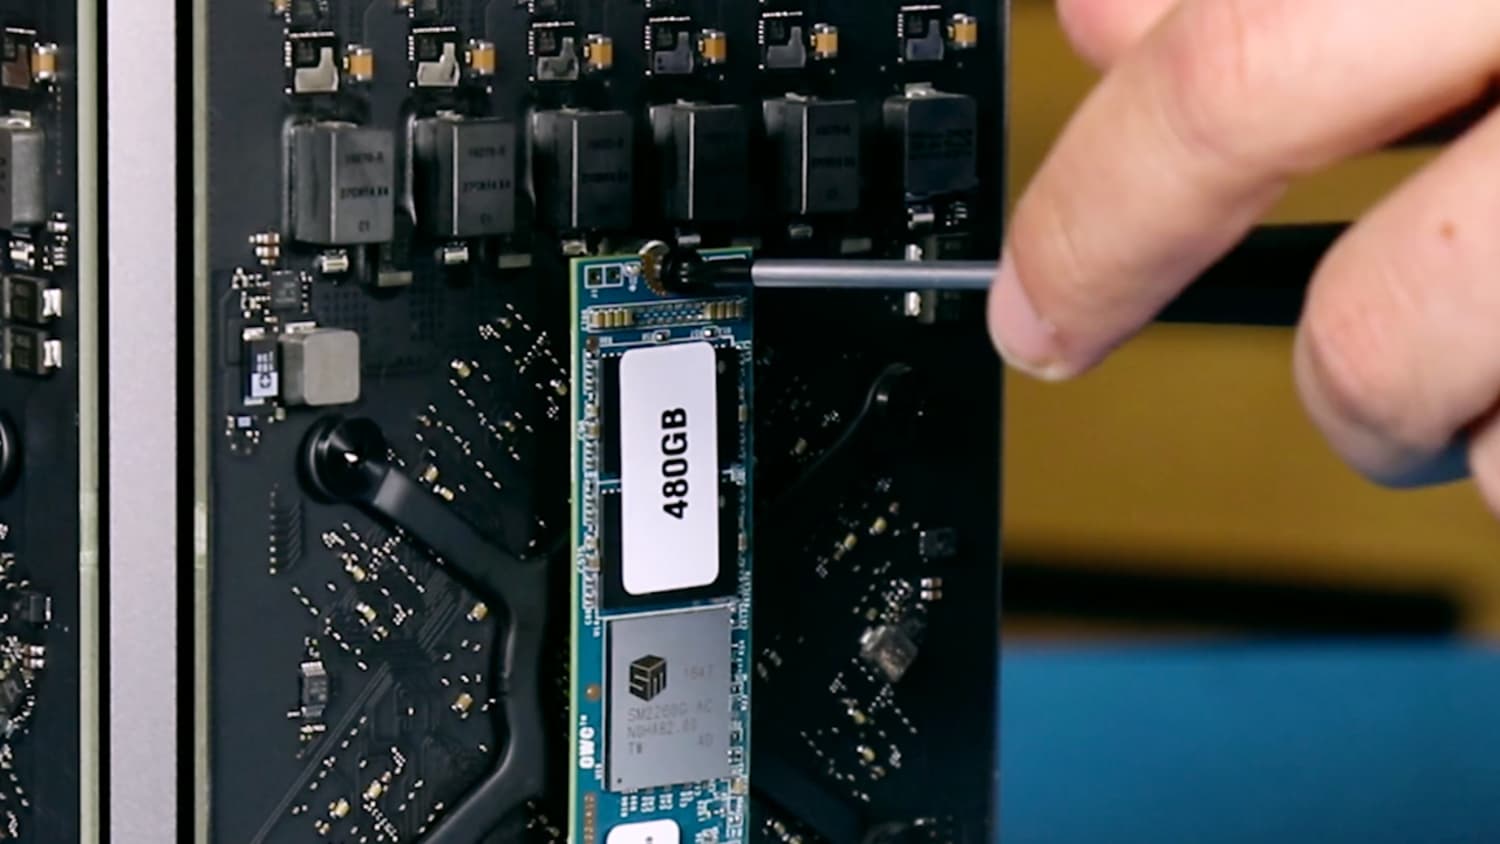
The most recent MacBook models come with a solid-state drive rather than a hard drive. The former is a much better option performance-wise, though it may not have as much available storage. Regardless, this upgrade is worth it, particularly if your old Mac has an upgradeable drive.
Of course, there is an argument to be made about replacing an old HDD with a new one. Overall, though, SSDs should still be your priority.
The process of replacing Mac’s disk is not that simple. Be sure to follow these instructions carefully.
First, you will need to access the old drive and take it out. Open the case by pressing the grooved side of the access door. Pick up the release latch and hold it until it becomes vertical.
Next, lift up the access door when they become raised enough. You will see a white plastic tab. Pull it carefully and take the battery out of the Unibody.
Once the battery is out, proceed to the hard drive. There should be a screw securing the HDD at the top. Loosen the screw and take it out. Carefully move the hard drive and be wary of the cable which is connected to the MacBook.
Once the old drive is out, you will have to remove the T6 Torx screws and put them on the new drive. The screws will be the line between the MacBook and your new disk.
Upgrading RAM
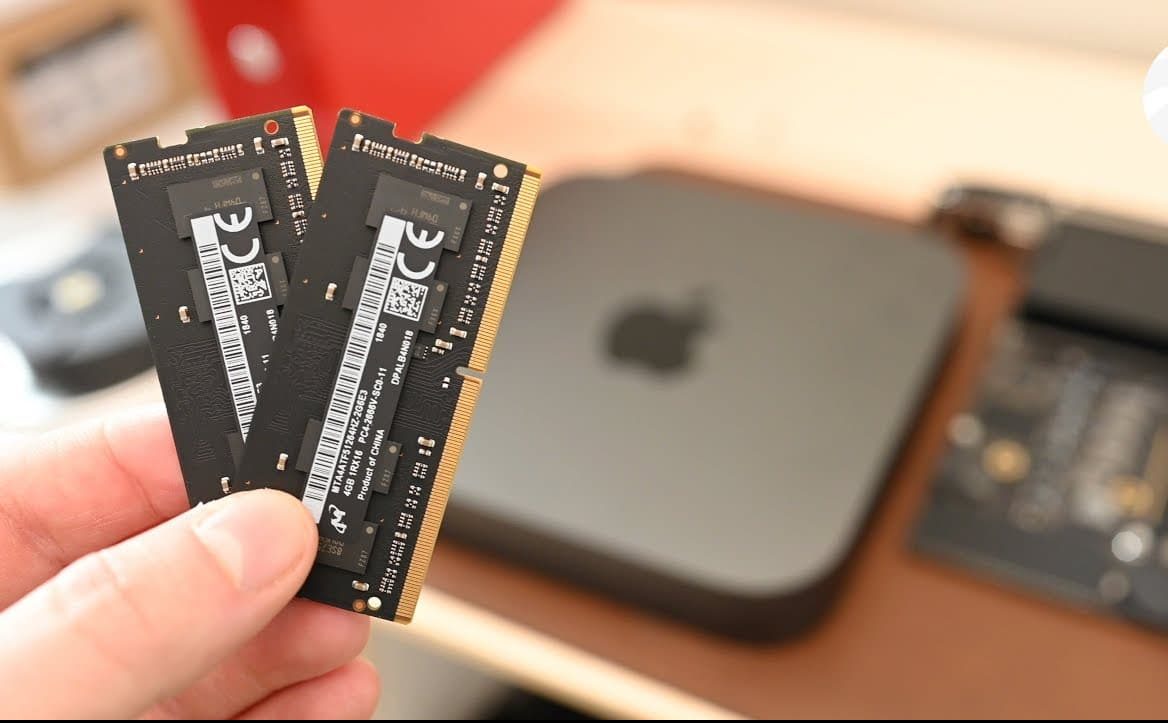
RAM is temporary storage that stores information to speed up everyday processes like surfing the net, loading applications, or playing video games. It also helps with the overall security. The computer system can read the stored data pretty much instantly and save you time.
Keep in mind, though, that there are some risks involved. For example, you may end up damaging your Mac, so be sure to take the necessary precautions. Also, upgrading the MacBook’s memory could void the computer’s warranty, though if your current model is pretty old, that should not be an issue.
Lastly, be sure to confirm that your Mac model is compatible with extra RAM. You do not want to waste money and time.
How much RAM should you get? Well, it depends on personal needs. Usually, 16 GB is a sufficient number, particularly if you do not work in video editing or other jobs that require a lot of computer resources.
Before you add RAM, shut down the computer and wait for a while for the internal hardware to cool. 10 minutes should be enough.
Remove the bottom case and make sure not to lose any screws. The RAM should be visible. You can remove the hardware by pushing the levers. Once you take out the old RAM, put the replacement and push it down, so it clicks into place.
Put the case back on and make sure that there are no loose ends. Wait for a bit and boot the MacBook. The new and improved version should be up and running now.
Upgrading GPU
An external GPU, or eGPU, could be a good investment. Apple has received criticism for its overpriced products and lackluster graphics performance. Be it video games or professional video editing software; integrated MacBook GPUs are not that great.
Luckily, Apple recognized the weakness of their computers. They figured out a different way to approach the problem, which was adding Thunderbolt 3 ports that are known for their speed.
If your Mac model has this port, you can take advantage of an external graphics processing unit and connect it to the computer.
One big advantage of an eGPU is that you do not have to overburden yourself while carrying the laptop. When you want to connect the GPU to the MacBook, you can do so after coming to an office or returning home.
AMD Radeon has a few compatible GPUs that you should consider getting. RX 470, RX 480, and RX Vega 64 are a few examples.
It ultimately comes down to your budget. Also, since these GPUs are external, you do not have to worry about opening up the internal hardware and possibly damaging it. No, think of an eGPU as an external computer accessory, like a mouse, a cooling pad, or a keyboard.
Lastly, it is worth pointing that the gimmick of external GPUs is still relatively new to MacBooks, and we can expect to see further developments in the future.